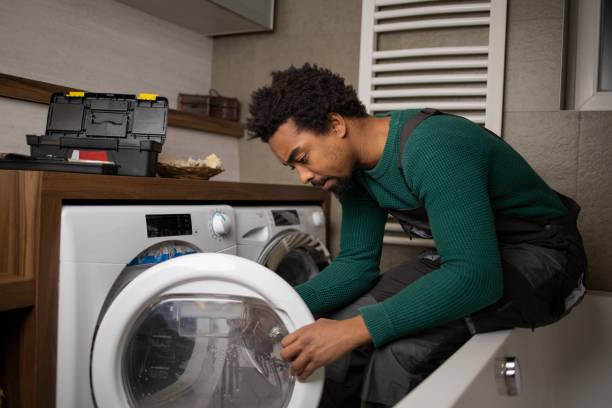
The main thing is to read the instructions beforehand. Conventionally, the entire process can be divided into the following stages:
- determining the location of the machine.
- Even installation of the unit on the level, and preparation of the floor covering.
- Connection to the sewage system and water supply.
- Connection to the mains.
- Check that the work is done correctly.
Now let’s look in detail at each step of the washing machine installation process. We offer detailed instructions consisting of 7 steps.
Where it is better to install the washing machine
The process begins not with the connection, but with the installation. All hoses must reach the utilities – sewage, and water supply system. The mains cable should also connect not to the extension cord, but directly to the power supply. Therefore, prepare a socket with moisture protection and grounding. Experts do not recommend making outlets above the floor. Retractable modules are the most effective way to protect against water ingress.
Install washing machines only on a flat and solid surface. Be sure to use a level. If you neglect this condition, there will be a shift of the drum, and over time it will not rotate at all. Carefully study the instruction manual for the technique. The documentation prescribes the optimal distance from the device to the bathtub, sink, basin, and other sources of water. Mostly we are talking about a distance of 10 cm. A similar distance should be from the walls.
Preparing to install the washing machine
You should not force the situation with the connection of the appliances to the main utilities, first, you need to carry out preparatory work. Be sure to check:
– The integrity of the factory packaging;
– the absence of traces of mechanical stress on the body of the machine;
– completeness of the basic equipment;
– Availability of instructions and accompanying documentation.
Be sure to remove the shipping bolts from the rear panel of the machine body. Operation of the device with these elements is strictly prohibited. There is a risk of damaging the drum. The bolts can be removed with an ordinary wrench. In the holes formed in their place, insert the plastic plugs that are included in the delivery set. Do not throw away the shipping bolts before the warranty period expires.
If you are installing the machine at a new location, then measure the pressure level in the drain pipes. A low-pressure level will cause the washing machine to work incorrectly. If this problem is not corrected in time, then the display will show a corresponding error code, and the washing cycle will be interrupted.
The recommended pressure level is from 0.3 to 0.6 bar. Refer to these figures. You can measure this figure with a manometer. To increase the pressure, you need to additionally install a pump. Some models of machines work without connection to the water system. Such devices draw water into the tank.
How to connect a washing machine to the sewer system
Start by choosing the type of connection. It comes in two types:
– permanent – the hose is connected to the washing machine, and its other end leads to the drain system. For example, you can use a siphon installed under the sink. Take care of the installation of a check valve, only after that secure the drain hose. Since the water should go into the sewer, not stay in the drum;
– Temporary – the hose also needs to be connected to the machine, but its second end is simply lowered into the bath or washbasin. Of course, you need to fix it, so it does not pop out under pressure.
The first option is the more appropriate solution.
Connecting the washing machine to the drain sometimes requires the additional purchase of a drain hose, because the one that is included in the basic set is too short. It all depends on the distance between the device and the drain system. The length of the hose can also be increased with a special connector.
How to connect the washing machine to the water supply
If we are talking about replacing an outdated washing machine with a new model, it greatly simplifies the connection process, because all the communications are already ready. Detailed instructions:
- Find the blue valve on the pipe of the water system. Connect the cold water hose to it.
- If you have access to hot water, then connect the hose to the red valve in the same way.
- If the tube turns out to be too short, you can buy another valve and then connect them together.
Connecting to the water supply from scratch
If you need to connect your washing machine without a water supply, you need to buy a self-clamping device to regulate the flow. Often they are included with the washing machine. These water flow regulators are connected to the pipes according to the following principle:
- Determine the optimal area on the pipe with cold water.
- Fix the top of the valve on the pipe, and the back panel behind it.
- Turn off the regulator by turning it to the appropriate position.
- Make a small hole in the water pipe with a drill to fix the regulator.
- Tighten the nuts, and connect the water hose.
Now you can use the machine.
How to level the washing machine correctly
During the spin, the washing machine rocks slightly. It is extremely important that it is installed on a level and solid surface. Otherwise, it may fall or damage the flooring. To check the correct installation, use a spirit level. If you don’t have one, then you can download a special app on your smartphone.
Adjust the position of the unit using the feet. Tilt the units slightly as you unscrew them. When the optimum balance is set, tighten the nuts so that the feet are locked in place. Some models do not have adjustable feet. In such cases, you need to put something under them, such as a small piece of rubber. However, from time to time the position of the technique will have to be adjusted because it will move.
If the room where the unit is installed is too slippery a coating, such as glossy tiles, the machine will move a little. To avoid this, put a thin rubber mat under it.
How to connect the washing machine to the mains
Start by studying the manual and the accompanying documentation, which specifies the power of the equipment. Predominantly on the market are models 1,5-3 kW. This means that the cable connected to the power supply will carry a current of up to 16A. The socket must have a ground connection. An additional advantage would be a safety disconnect device that trips if the main cable is damaged.
The use of extension cords is strictly prohibited. This type of connection does not have proper protection against moisture. You may have to make a new power supply. For this kind of work, it is better to invite a professional electrician who will punch through the walls, and lay the electrical cable from the panelboard. Install outlets with indicator lights. It lights up when you turn on appliances.
The best solution is to call a master at home or contact the service center. This calls us, and we will give you the best repair HOME APPLIANCE SERVICE CENTER. With our superior performance, absolute accuracy, extensive knowledge and experience, fast and efficient service, friendly attitude, free maintenance consultation, and after-service warranty, we are proud to say that we are the leading Repair Service Provider in San Diego. Customer satisfaction is our top priority, and we are always committed to what we do. We are open 24/7 a week, on weekends and holidays. Our technicians will come to you 15 minutes after your call in urgent cases. Give us a call, and the HOME APPLIANCE SERVICE CENTER will solve any problem.
Contact us
 619-928-5000
  Request Service
